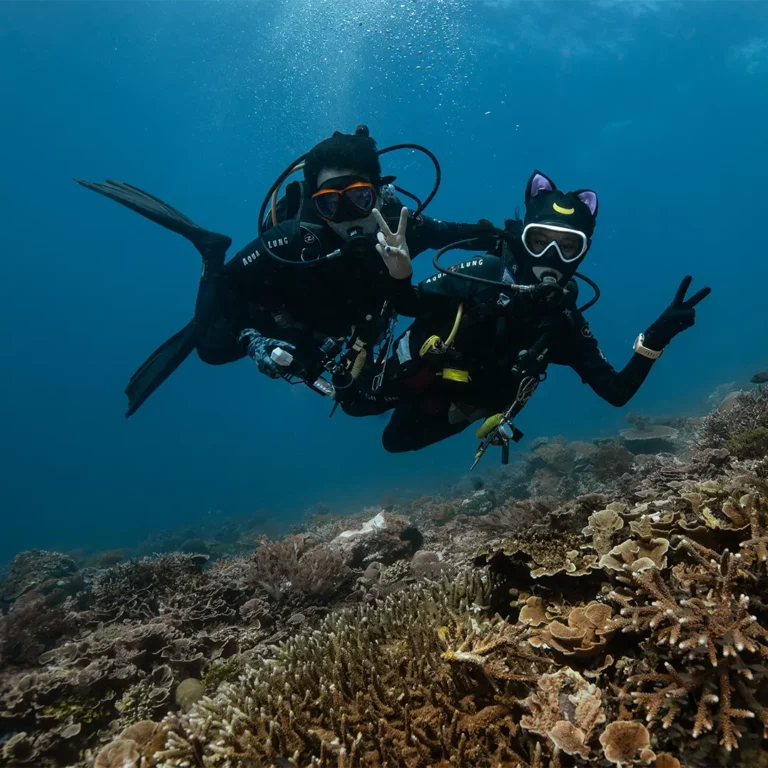
Capturing expansive views of marine life is possible with wide-angle photography. The most popular definition of wide-angle is a view field that is approximately 65 degrees wider than human vision.
A good rule of thumb for subject size is that anything bigger than a basketball belongs in the wide-angle category. A dense water column in the aquatic realm will progressively distort your image, removing colour and clarity. This gets worse the further you are from your subject.
For this reason, getting close to your subject while preserving the perspective of the surrounding landscape helps preserve the sharpness and vibrancy of an image. Wide-angle underwater photography is therefore appealing. Wide-angle viewpoint image framing comes in two primary varieties. The angle of a fisheye is incredibly wide. They typically have a 180-degree view.
They pack as much as they can into a shot, and the lens distortion causes them to produce non-straight lines. The second kind are rectilinear wide angles. They offer nearly 180 views, but not the entire 180. They maintain nearly straight lines but with less distortion than fisheye.
Recommendations for Wide Angle Equipment
Possessing a rectilinear or fisheye lens with the appropriate housing and dome port is crucial for wide-angle photography. Our top picks are the Canon EF 8–15mm fisheye and the Canon EFS 10–18mm rectilinear wide-angle. These lenses work really well with Canon EOS Rebel SL1, giving us crisp, detailed photos with a deep depth of field even up close.In addition to the camera, lens, and housing, two strobes are essential for wide-angle photography.
Setting Up a Wide Angle Camera
Camera settings are the next thing to think about after you’ve determined what you need in terms of wide-angle camera gear. In the intricate field of wide-angle photography, an intriguing shot can be achieved by experimenting with different camera settings. The conditions and surroundings can also affect these settings. For DSLR users who are new to wide-angle photography, we recommend setting your camera to manual mode as follows:
|
Shutter speed |
Aperture |
ISO |
|
1/100 – 1/125 |
f/8 |
200 – 400 |
Depending on the intended effect and the setting for the shot, we like to adjust our exposure. We use an ISO of 200 and a shutter speed of 1/125 to 1/160 when we dive in tropical waters. We adjust our aperture to f/5.6 when photographing subjects that are farther away or in waters with reduced visibility.
ALSO READ : The Best Underwater Cameras of 2024
5 Tricks and Advice for Taking Wide-Angle Photos:
The technique of wide-angle photography has many facets. Learning it can take years, if not decades. The following are some pointers and strategies to improve the outcomes of your wide-angle photos:
1. Framing and Camera Angle
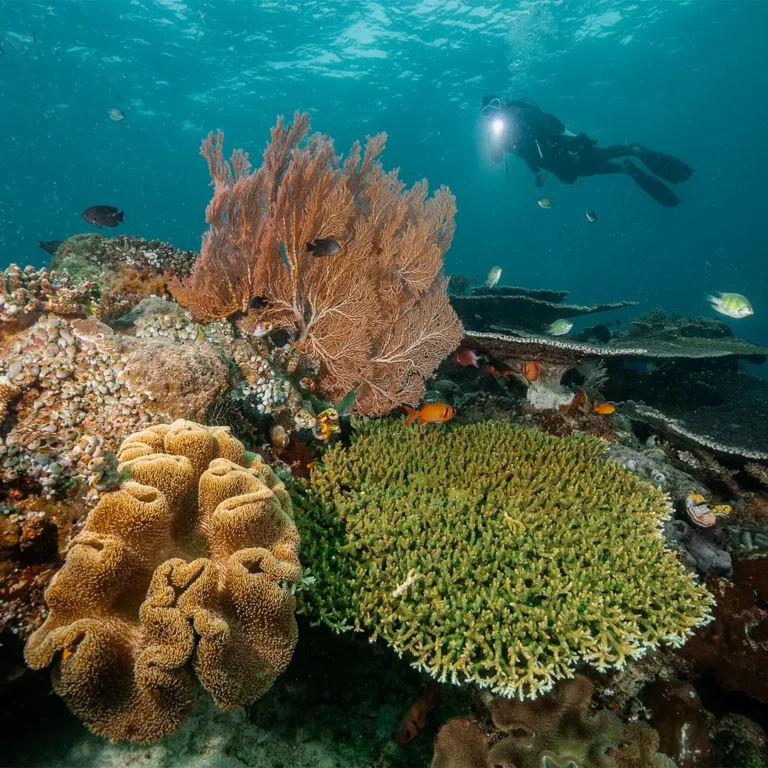
The essential component of any photography image is composition. A well-lit foreground with a focal subject and a strong background with complementary elements like the sun, a diver, a boat, fish, or a structure are essential components of a good wide-angle underwater photo.
This produces a unified, visually arresting shot. When taking wide-angle photos, consider your canvas as a collection of layers. See them as a path that flows visually from the foreground to the background, then arrange and stack them in your composition accordingly. Amazing compositions can result from the use of leading lines, curves, and spirals. Moreover, shooting from an upward angle gives your images depth and captivating viewpoints.
Use the picture below as an illustration. This aquascape’s layering has been emphasised so you can see how we would dissect an image. The focal point, or the sizable section of soft coral at the centre of the picture, is represented by the first layer. The close-packed reef mounds surrounding the soft coral in the second layer go hand in hand with this. The far-off cascading reef that flows upwards is depicted in the third layer, and the fish and surface water that finish the composition beautifully are depicted in the final layer.
2. Distance from Dome Port to Subject
The nature of the lens naturally creates some distance between the photographer and their subject when taking wide-angle photos. Getting your foreground subject to fill a good chunk of the screen is a great way to get rid of this space.
Thus, without actually touching your subject, get as close as you can! A lot of striking wide-angle photos feature a subject that is just inches away from the dome. This enables the lens’s and the dome’s curved shape to draw attention to your subject.
ALSO READ : 6 Underwater Macro Photography Techniques
3. Shoot Frequently
One, two, or ten shots should be made. You have a better chance of getting the perfect pose for a photo if you take more pictures of your subject or composition. To remove the less fulfilling ones from your surface interval, you will have plenty of time. Perfectionism comes from practice!
4. Make a Strobe Adjustment
Focus on lighting the foreground subject because it will be nearly impossible to achieve uniform lighting across the frame of your wide-angle shot. Reviving the vibrancy of your image can be achieved with the help of one or two strobes. Try using your strobe on a long arm to avoid overexposing the subject.
Though it’s common practice to place strobes at the 10 and 2 positions on a clock face, it’s crucial to move them fluidly to suit your surroundings and the subject you’re photographing. For example, pointing the strobes outward rather than at the subject is important in areas with a lot of backscatter.
We pull our strobes further back behind the dome port to even out the lighting because with a fisheye lens, it’s easy to unintentionally light up the water column due to their close proximity.
Other useful strobe adjustments are to position the strobes wide when photographing large scenes or schools of fish, and to tighten the strobes to the housing for close-focus wide-angle photography.
5. Orientation of Camera
Like most photographers, I also tend to fall into the horizontal rut. We get too lazy to change the orientation of our cameras because doing so would also require changing the strobes. Avoid falling into this trap when taking wide-angle photos. Show courage and audacity. Try shooting scenes from the top and bottom. You might surprise yourself by realising very quickly that the orientation you had in mind for the shot is not the best choice.
6. Practice on Immobile Objects
Mastering the framing and lighting of immobile subjects is another excellent beginner habit. We promise that it will significantly ease your life. The best practice objects are sponges and coral. They can be very helpful in teaching you, through trial and error, how to balance your image because of their immobility and occasional burst of colour.


